Quickstart
- Marquez Data Model
- Write Sample Lineage Metadata to Marquez
- Explore Sample Lineage Metadata using Marquez
- Collect Run-Level Metadata using OpenLineage
- Summary
- Next Steps
This guide covers how you can quickly get started collecting dataset, job, and run metadata using Marquez. We’ll first introduce you to Marquez’s data model, show how to write sample lineage metadata to a running Marquez instance, then explore the sample lineage metadata via the web UI.
PREREQUISITES
Before you begin, make sure you have installed:
Note: In this guide, we’ll be running the Marquez HTTP server via Docker.
GET MARQUEZ
To checkout the Marquez source code, run:
$ git clone https://github.com/MarquezProject/marquez && cd marquez
Marquez Data Model
METADATA STORAGE
Marquez’s centralized data model provides a normalized representation of the end-to-end metadata of your pipelines (composed of multiple jobs) with built-in metadata versioning support. The data model also enables highly flexible data lineage queries across all datasets, while reliably and efficiently associating (upstream, downstream) dependencies between jobs and the datasets they produce and consume. We encourage you to familiarize yourself with the data model below:

Figure 1: Marquez’s metadata storage model.
The above data model generalizes very well when you start collecting basic metadata from multiple sources, schedulers and/or data processing frameworks. With metadata changes tracked, you can easily, for example, query the history of schema changes for a given dataset and compare a previous schema version with the latest schema version. Note this is especially useful for auditing or troubleshooting impacted jobs downstream of a schema change.
METADATA VERSIONING
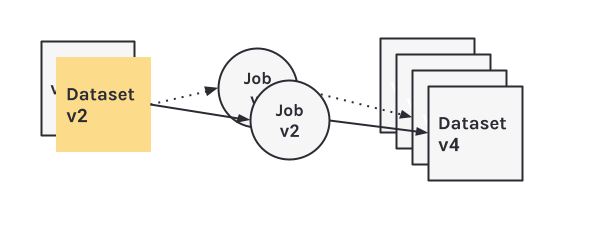
Figure 2: Marquez’s metadata versioning model.
Run-level metadata is tracked via HTTP API calls to /lineage using OpenLineage. A run has a unique ID and records it’s code version, inputs and outputs, run args, and run state transitions. When a run transitions to a complete state, the output datasets for the run are created if not already registered with Marquez. A dataset version pointer is present for each input and output dataset and maintained by Marquez keeping track of the historical set of metadata changes. Each immutable dataset version is mapped to a metadata change and the run ID that modifyed the dataset preserving it’s state at some given point in time. A job version pointer is also present and mapped to a unique referenceable link to code, the latest run ID, and one or more versioned input and output datasets.
Write Sample Lineage Metadata to Marquez
In this example, we’ll be using sample dataset, job, and run metadata for a hypothetical Food Delivery website. The sample metadata consists of hourly and daily ETL jobs that query tables in a postgres database used for reporting and analytics. So, let’s get started!
To start Marquez with sample metadata that will be used and referenced in later sections, run the following script from the base of the Marquez repository (the --seed flag will execute the marquez seed command):
$ ./docker/up.sh --seed
Tip: Use the
--buildflag to build images from source, or--tag X.Y.Zto use a tagged image.
To view the Marquez UI and verify it’s running, open http://localhost:3000. The UI enables you to discover dependencies between jobs and the datasets they produce and consume via the lineage graph, view run-level metadata of current and previous job runs, and much more!
Explore Sample Lineage Metadata using Marquez
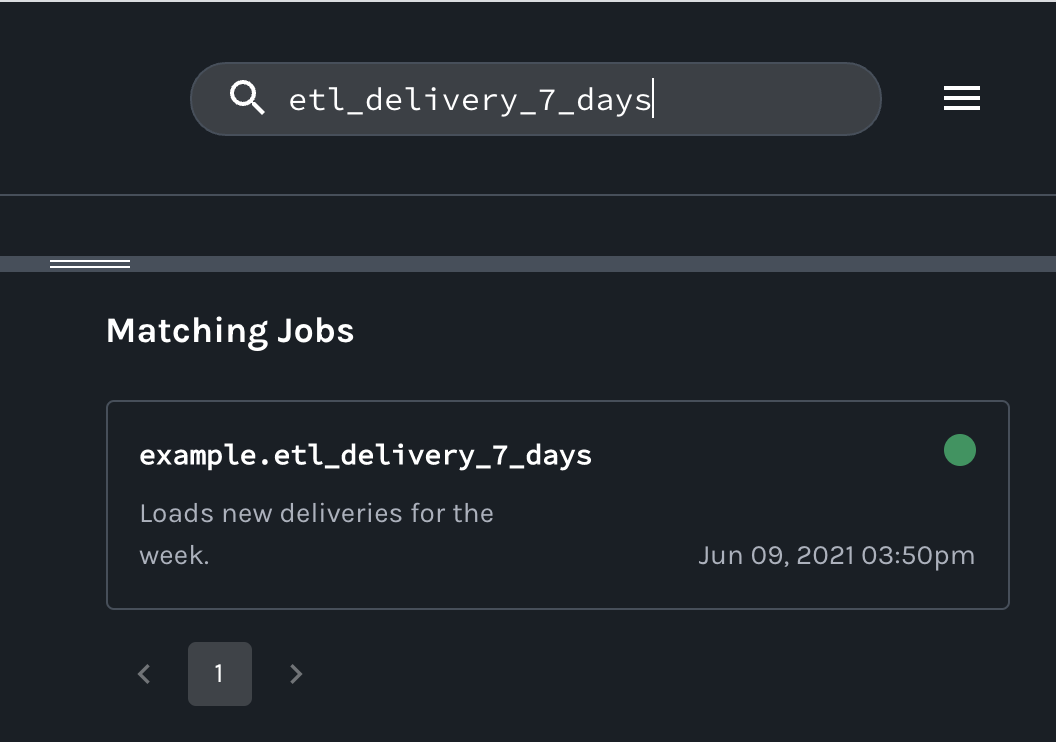
SEARCH JOB METADATA
To view lineage metadata collected by Marquez, browse to the UI by visiting http://localhost:3000. Then, use the search bar in the upper right-side of the page and search for the job etl_delivery_7_days. To view lineage metadata for etl_delivery_7_days, click on the job from the drop-down list:
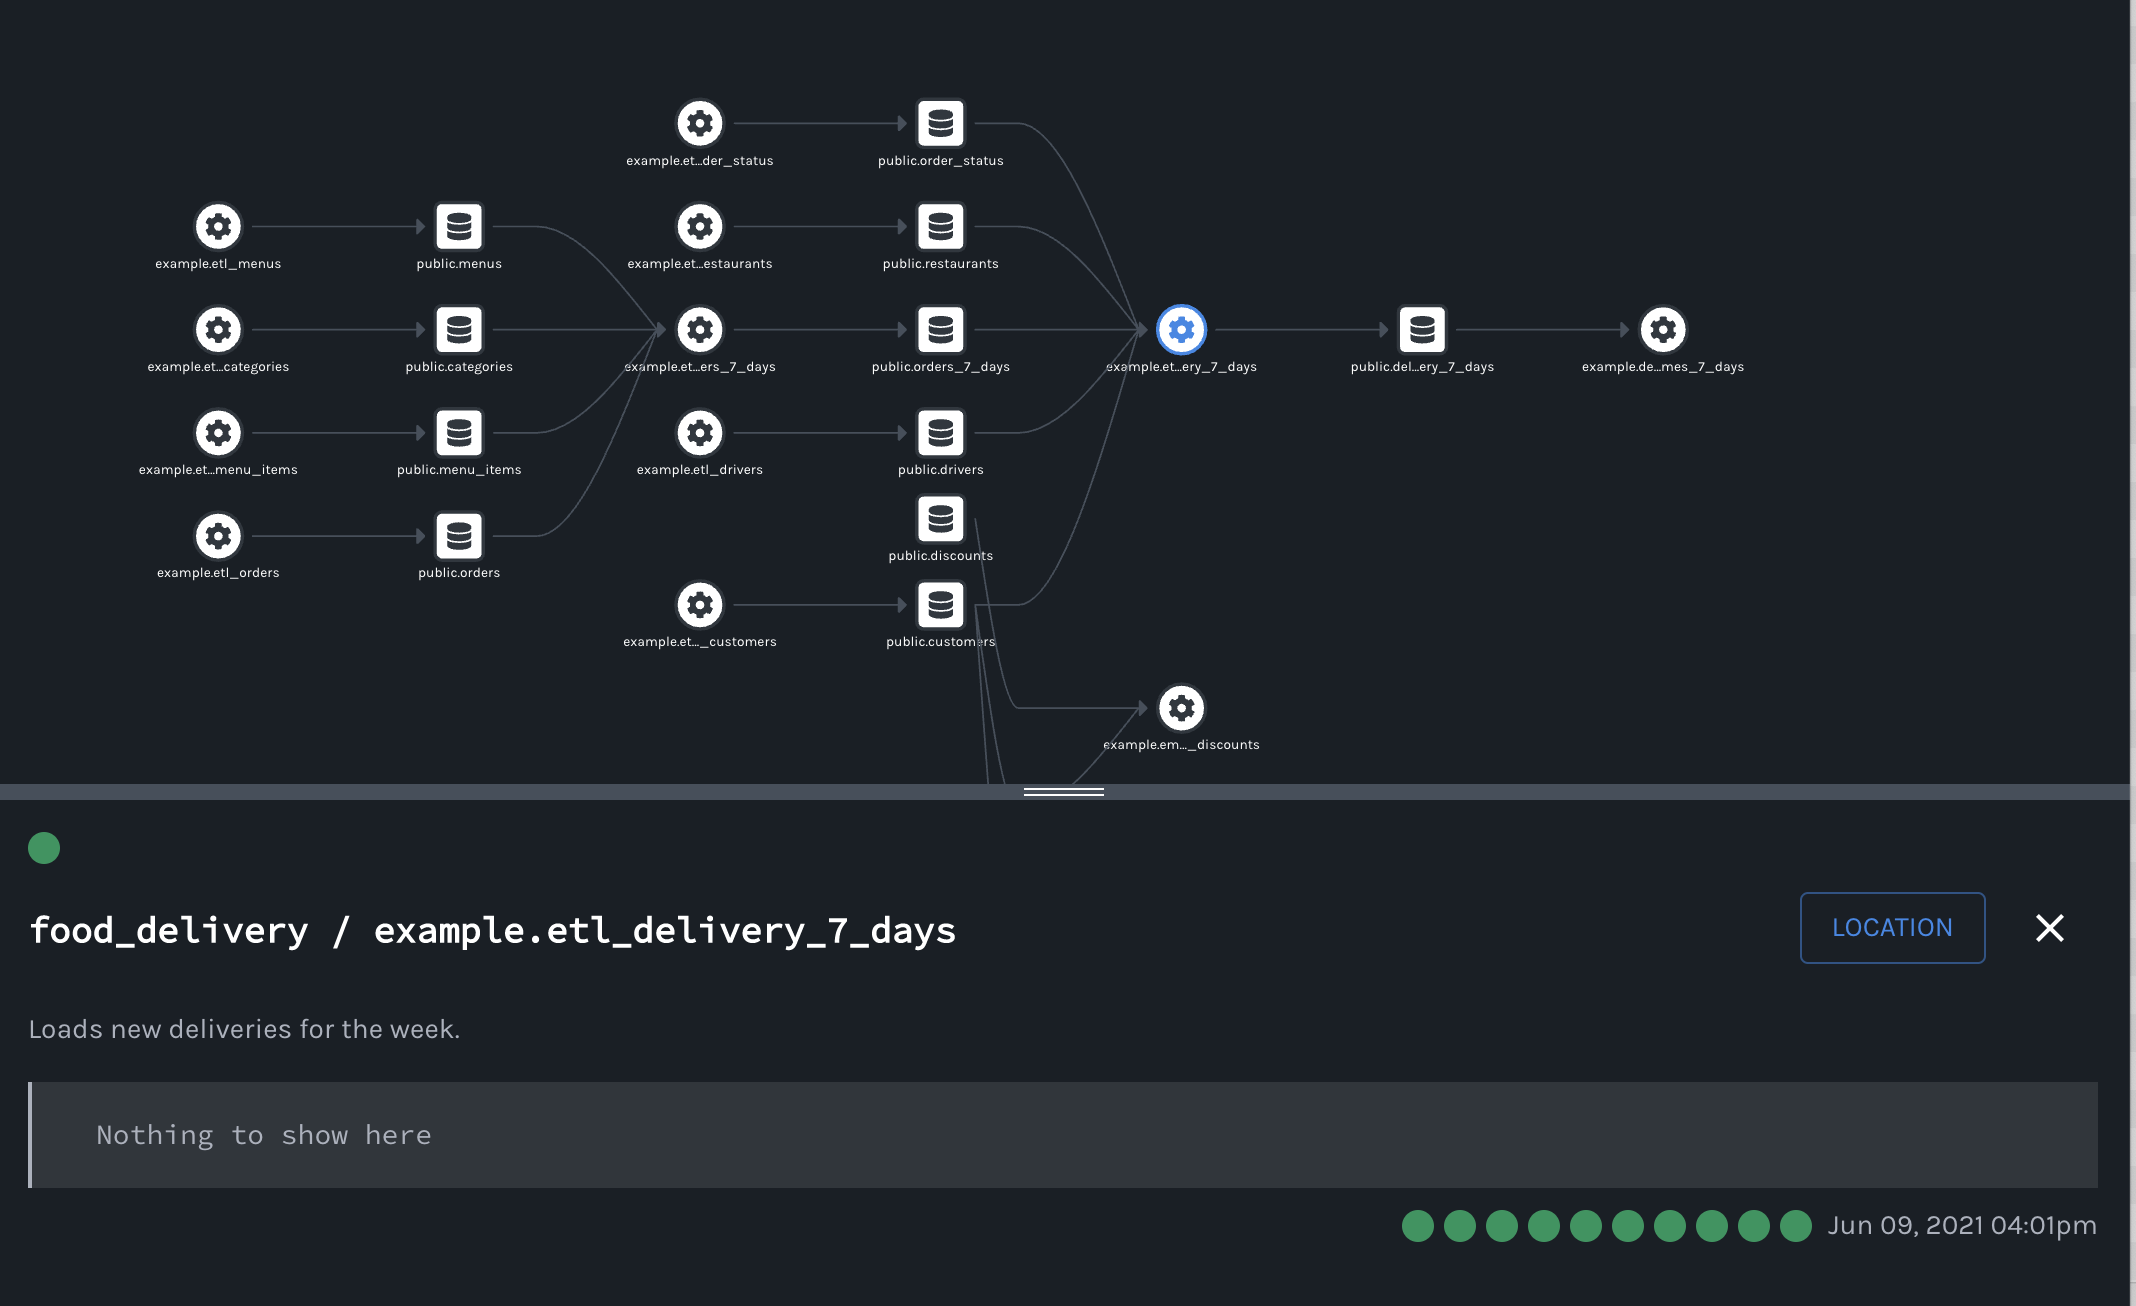
VIEW JOB METADATA
You should see the job namespace, name, input and output datasets, and the job run marked as COMPLETED:
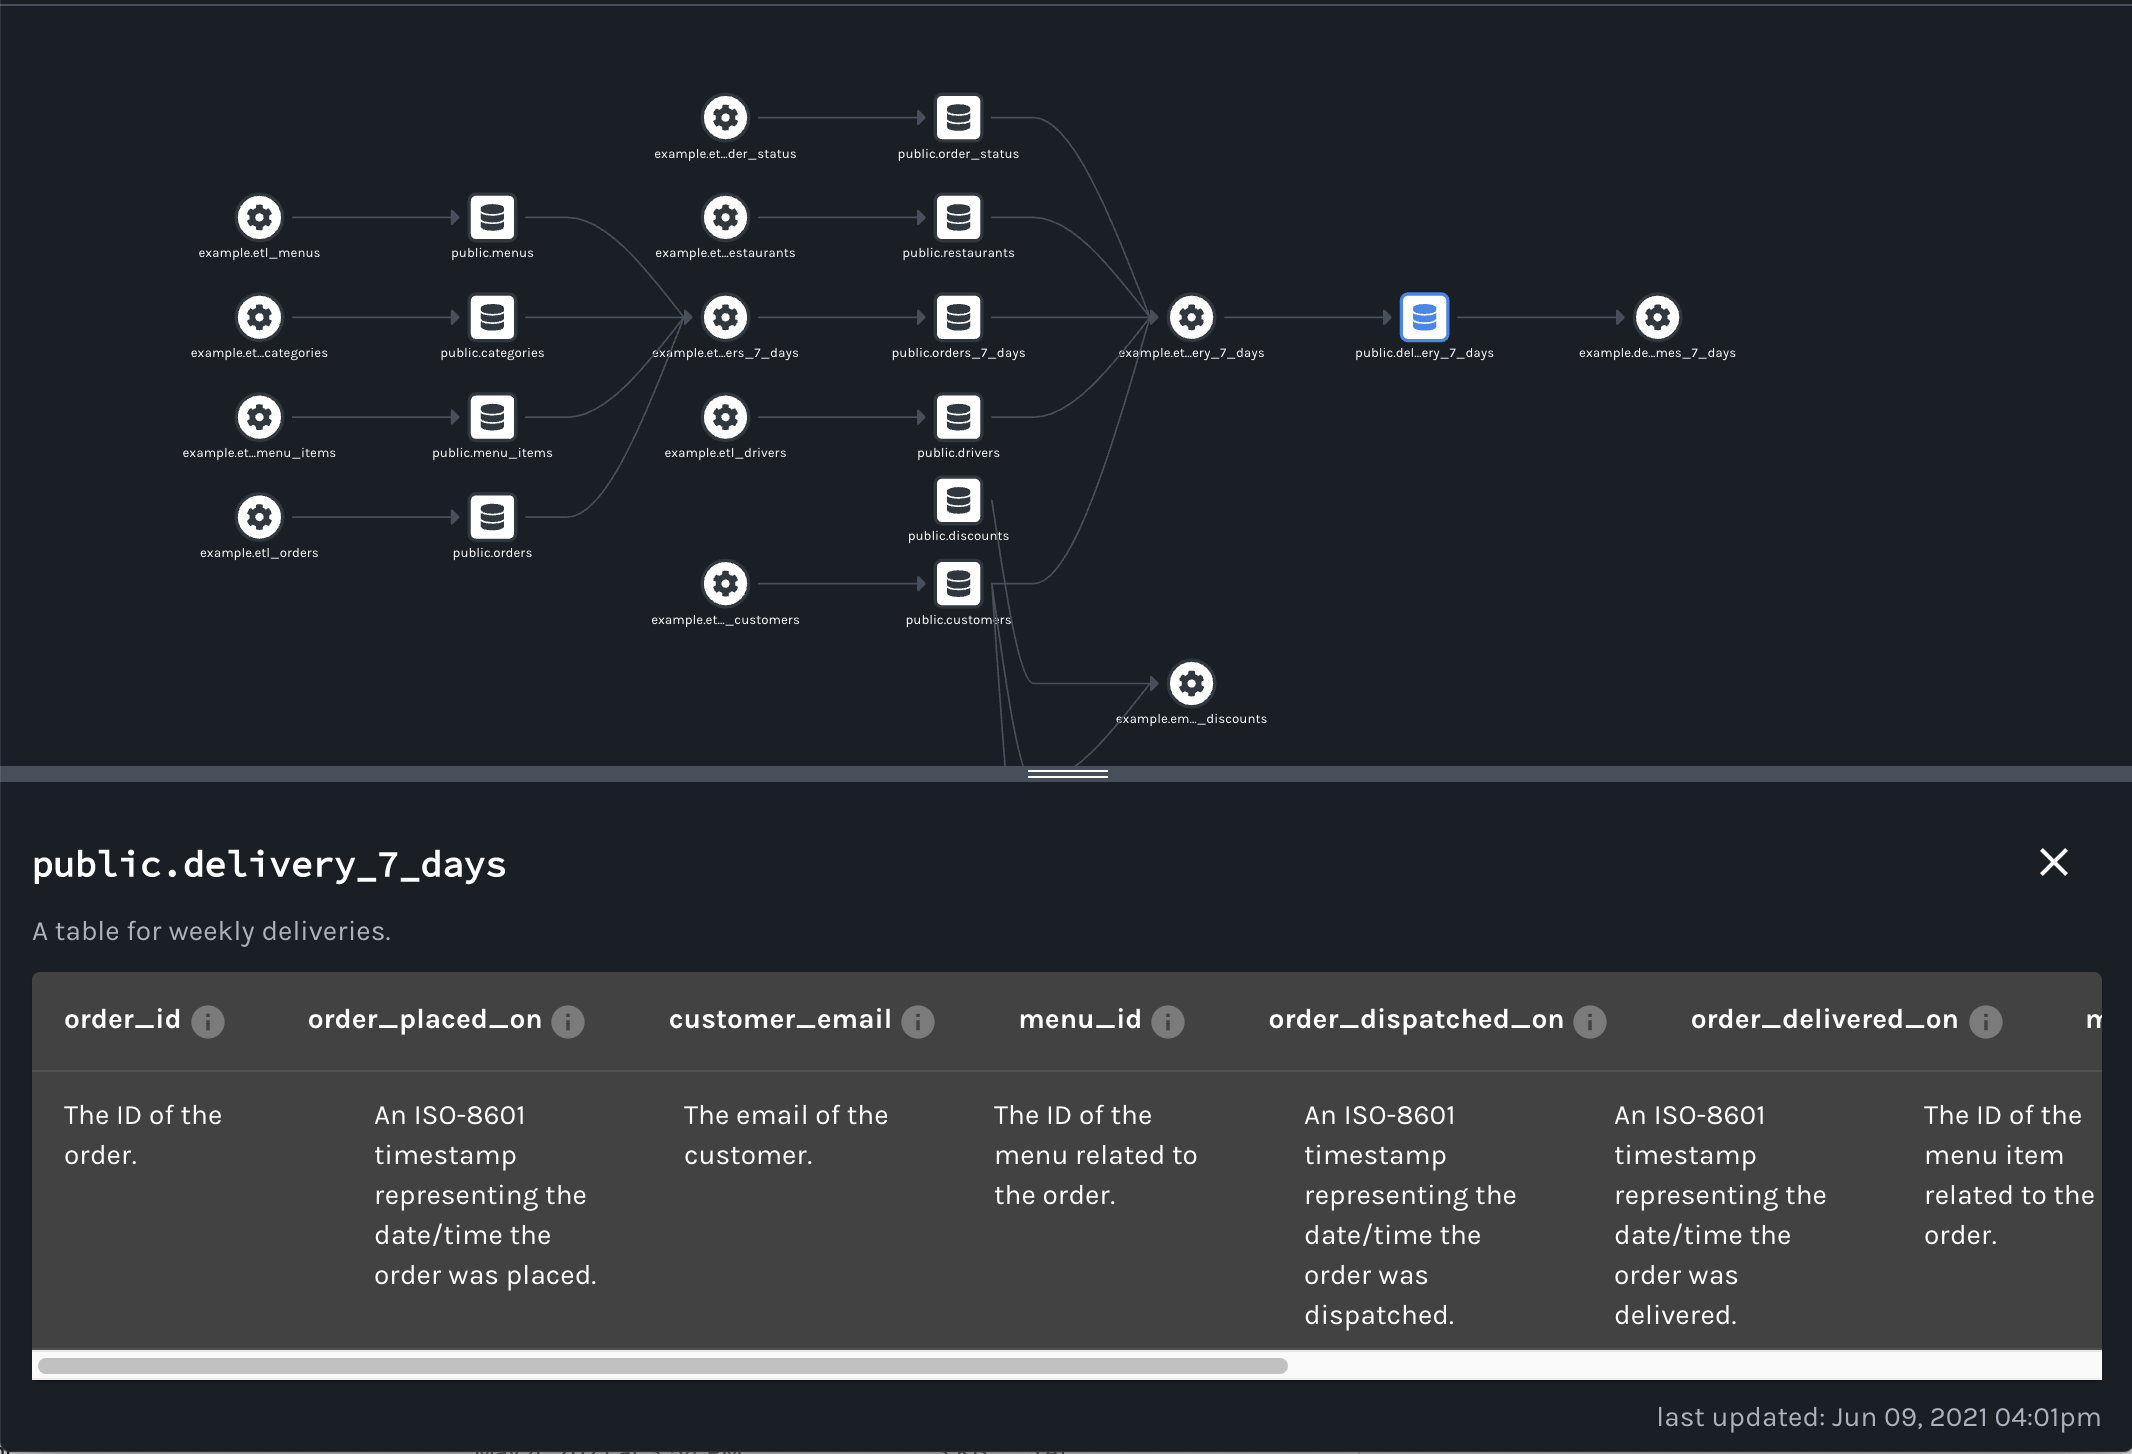
VIEW INPUT DATASET METADATA
Finally, click on the output dataset public.delivery_7_days for etl_delivery_7_days. You should see the dataset name, schema, and description:
Collect Run-Level Metadata using OpenLineage
To collect run-level metadata as OpenLineage events using Marquez as the HTTP backend, see the OpenLineage getting started guide!
Summary
In this simple example, we showed you how to write sample lineage metadata to a running Marquez instance, then explored the sample lineage metadata for the job etl_delivery_7_days via the web UI.
Next Steps
- Take a look at our Airflow example to learn how to enable metadata collection for Airflow DAGs and troubleshoot failing DAGs using Marquez.
- Listen to Solving Data Lineage Tracking And Data Discovery At WeWork.
- Listen to Unlocking The Power of Data Lineage In Your Platform with OpenLineage.
- Watch A Metadata Service for Data Abstraction, Data Lineage & Event-based Triggers.
Feedback
What did you think of this guide? You can reach out to us on slack and leave us feedback, or open a pull request with your suggestions!
SPDX-License-Identifier: Apache-2.0 Copyright 2018-2023 contributors to the Marquez project.